Quickstart
If you are setting up Rapid-QC-MS for the first time – or setting up Rapid-QC-MS on a new instrument PC – please follow the steps in this section to properly configure your chromatography methods and QC parameters.
Important note: This section does NOT show you how to install Rapid-QC-MS! If you haven’t already, please follow the steps in the installation guide before you start configuring methods and parameters.
Overview
This section will walk you through configuring the bare necessities to set up Rapid-QC-MS jobs for your instrument runs.
- Start Rapid-QC-MS
- Setup instrument computer workspace
- Configure internal standard libraries
- Configure IS parameters
- Specify MS-DIAL location
- Set up a new QC job
When you’re ready, you can visit the user guide to configure additional settings such as Google Drive sync, Slack/email notifications, biological standards, and MS-DIAL processing parameters.
1. Start Rapid-QC-MS
To launch Rapid-QC-MS, open a Terminal or Command Prompt window and type:
> .\<path-to-venv-folder>\Scripts\activate
(yourenv) > rapidqcms
2. Setup instrument computer workspace
After following the installation guide, you should be greeted by the following welcome screen:
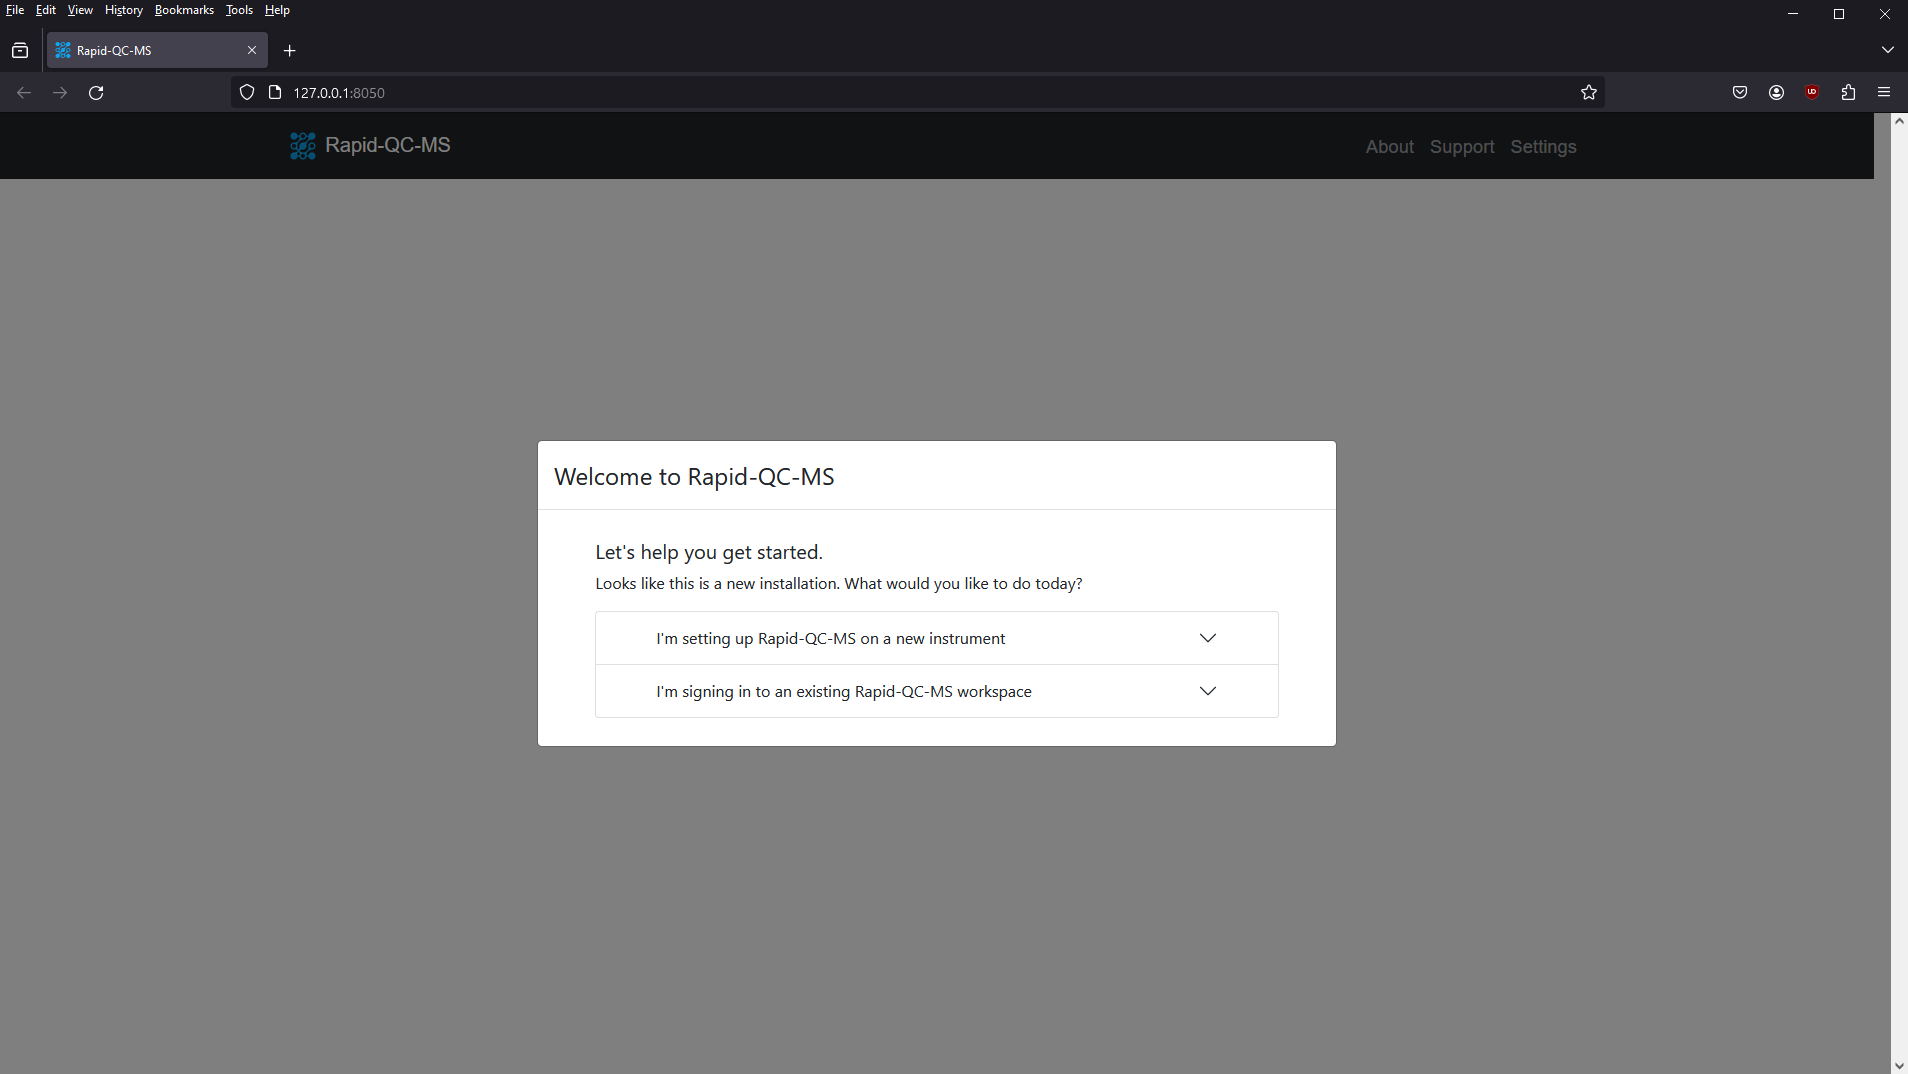
Select I’m setting up Rapid-QC-MS on a new instrument. Then, you will be prompted to give your instrument a unique name (at least 4 characters) and select your instrument’s vendor.

Optional: Sync with Google Drive
If you opt to set up Google Drive sync, you’ll be able to share your workspace with your team and access QC results from any device.
This step is optional and NOT required. If you decide you want to set up sync later, you can do so via Settings > General. If you’d like to set it up now, do the following:
- Generate your client credentials using the Google API Console
- Provide Rapid-QC-MS with your client ID and client secret
- Click “Sign in to Google Drive” and authenticate with your Google account
- Close the tab that says “The authentication flow has completed” and you’re all set.
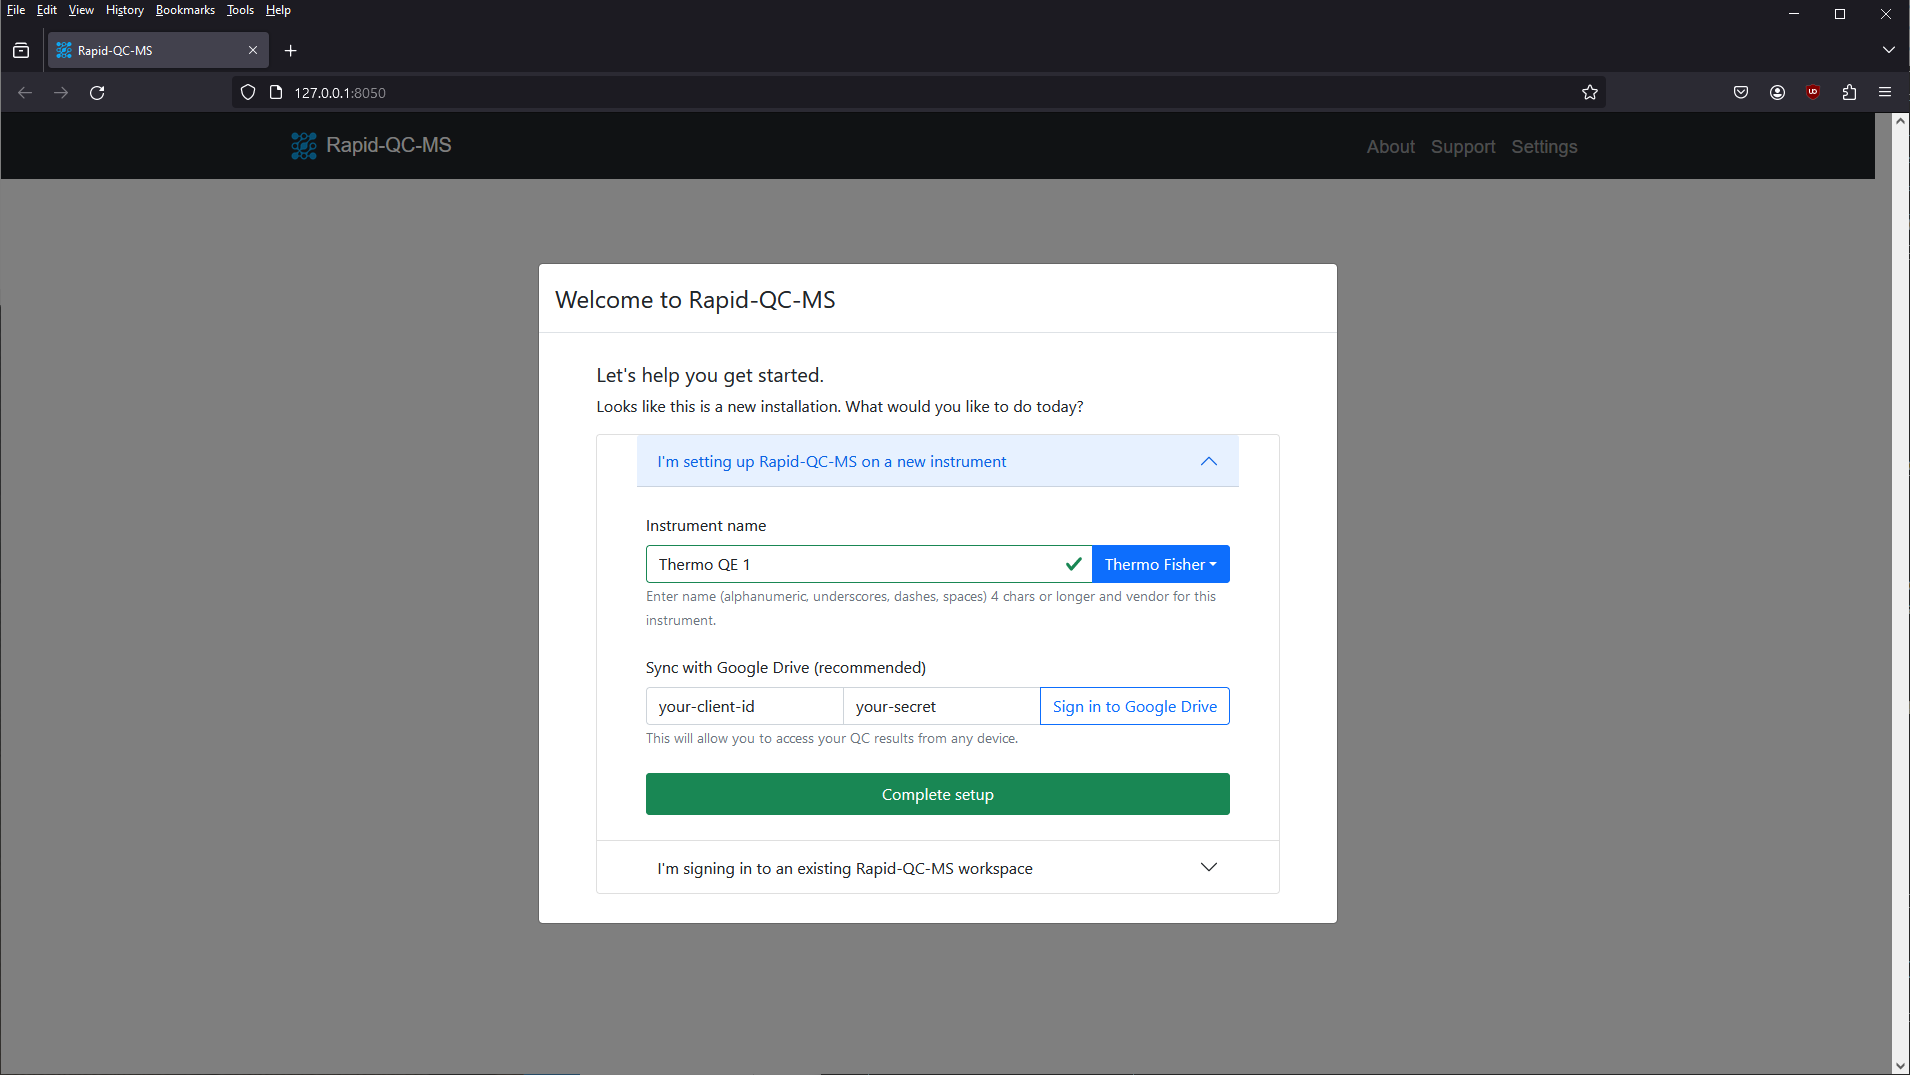
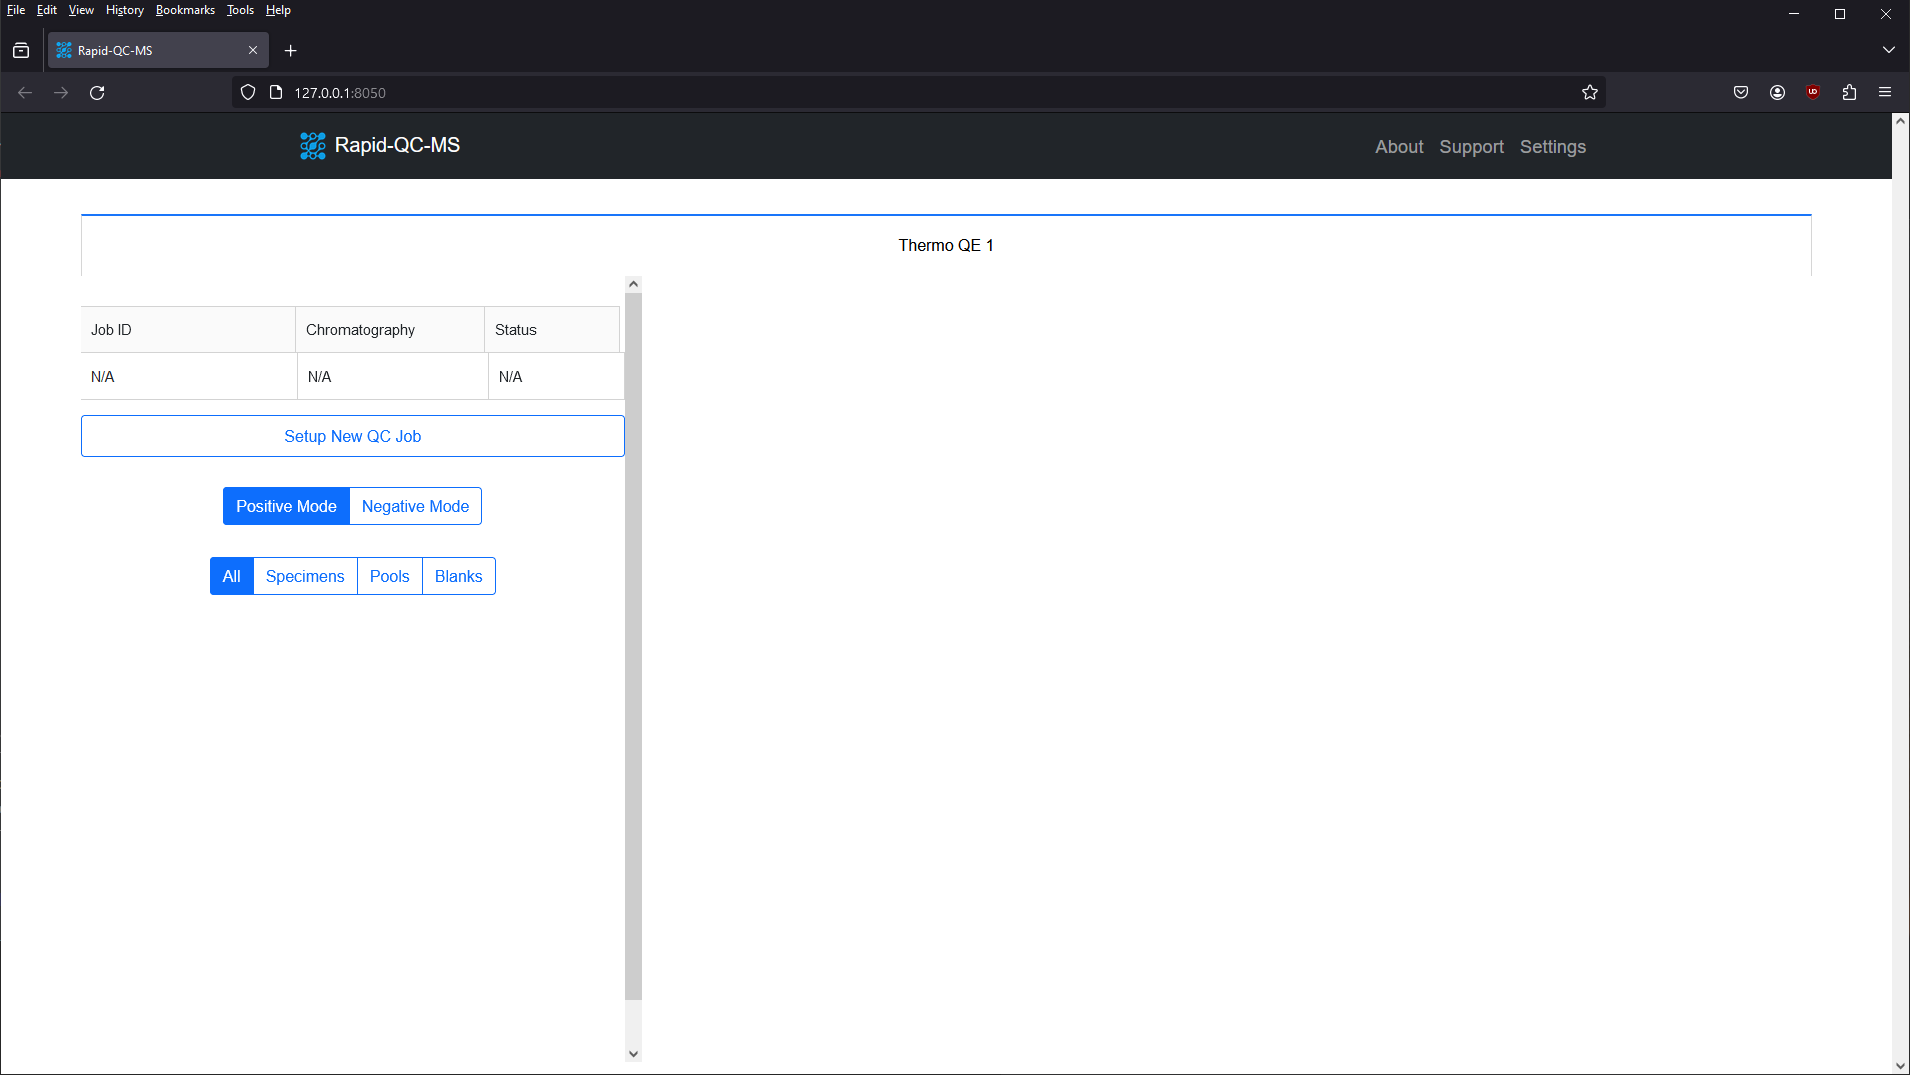
Once you’re done, click Complete setup to create your workspace. After your workspace loads, it should look something like this:
3. Configure internal standard libraries
Now that the workspace has been created, you’re ready to start configuring your chromatography methods and corresponding internal standards. The workflow for adding internal standards is simple:
- Add a chromatography method
- Select the chromatography and polarity to modify
- Add an internal standard library
- Optional: Set a different MS-DIAL processing configuration
3a. Add a chromatography method
Navigate to Settings (in the top right corner) > Chromatography Methods. Once you’re there, it should look something like this:
![]()
In the Manage chromatography methods section at the top, add a new chromatography method by giving it a name and clicking Add method.
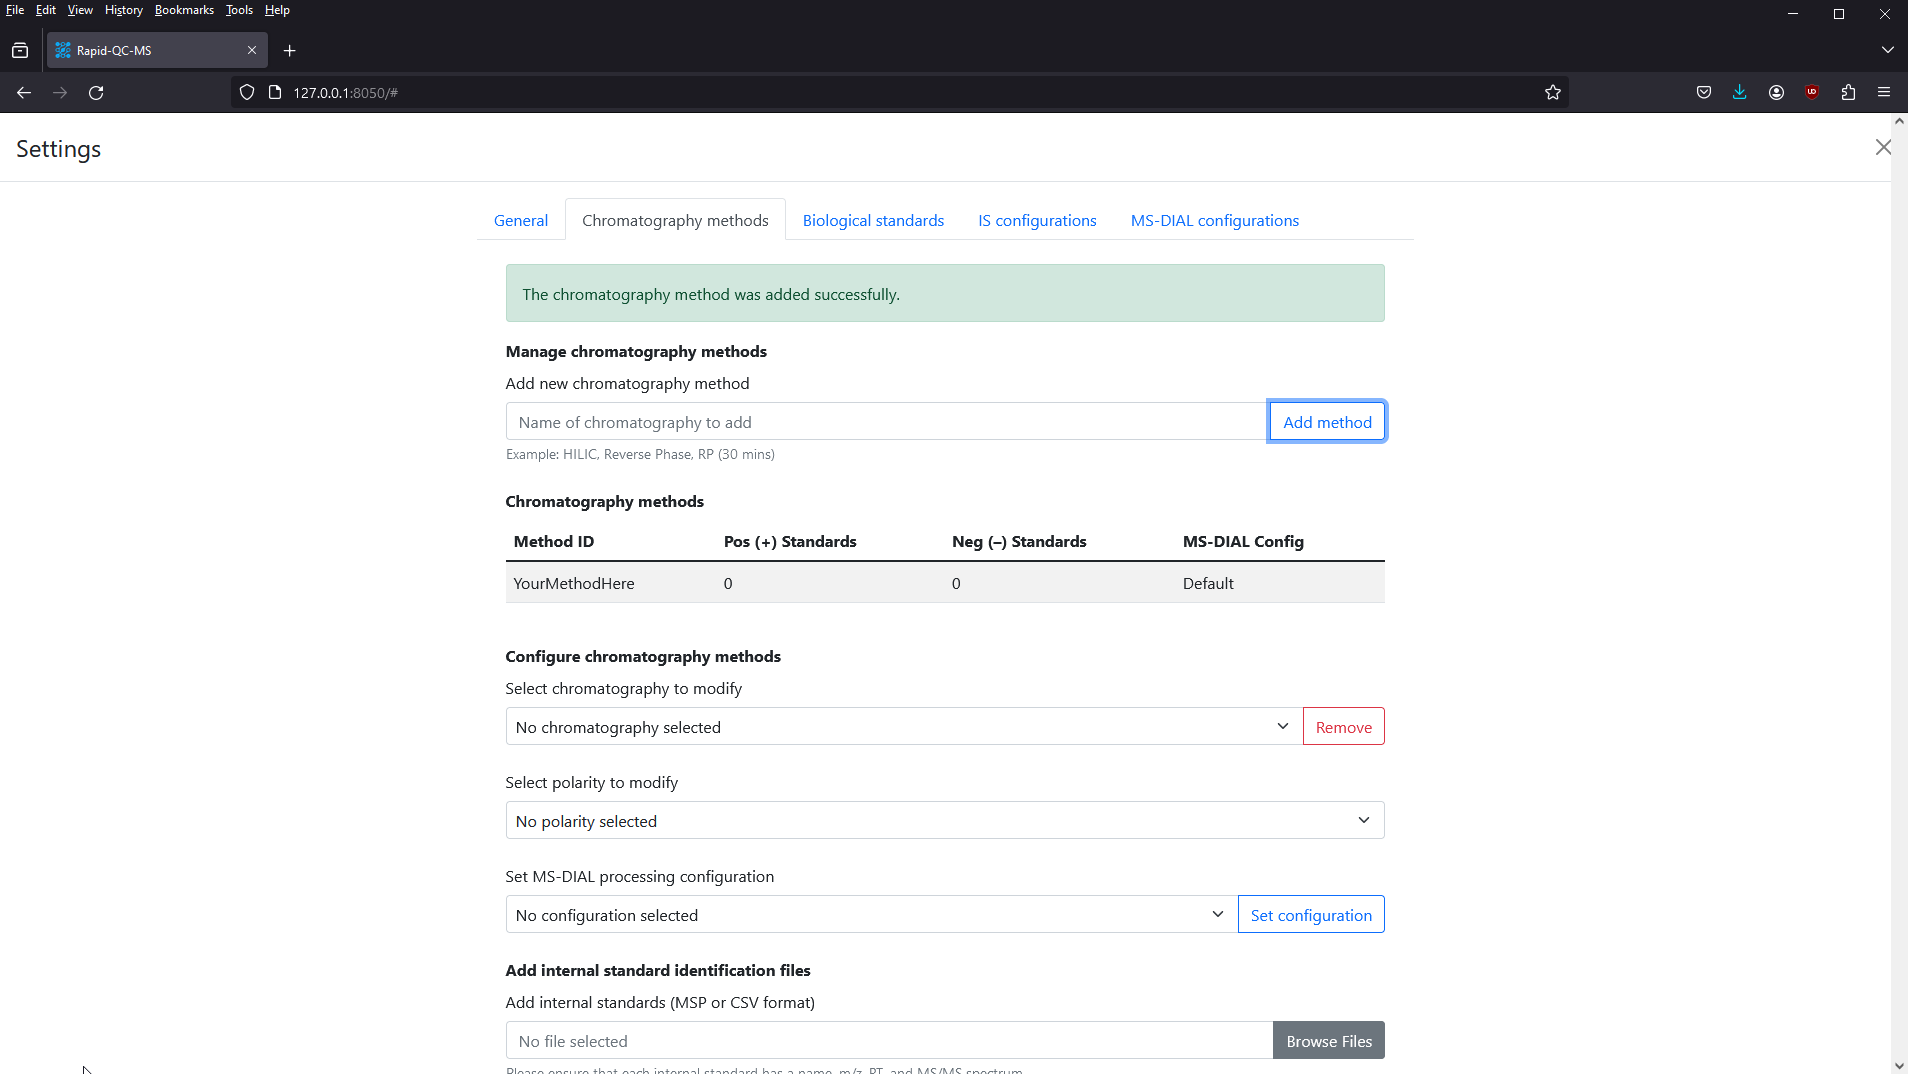
If successful, you should see your new method in the Chromatography Methods table.
3b. Select the chromatography and polarity to modify
Internal standards are configured separately in positive and negative mode within each chromatography method.
Let’s start by selecting the chromatography method you created, and then selecting Positive Mode for the polarity.
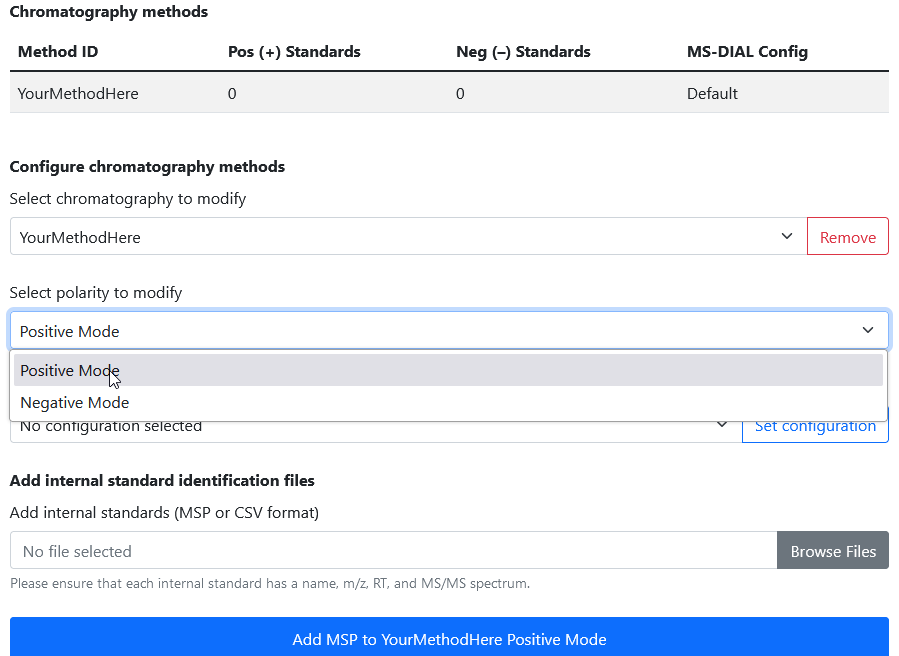
3c. Add an internal standard library
Now, we can specify our internal standard library. Rapid-QC-MS accepts identification libraries in either MSP or CSV format.
It is important to note that MS-DIAL can only perform MS2 spectral matching using MSP libraries. If you use a CSV library, identification will be performed via m/z and RT matches.
Here is an example internal standard library in CSV format:
| Common Name | MS1 m/z | RT (min) |
|---|---|---|
| 1_Methionine_d8 | 158.1085398 | 7.479 |
| 1_1_Methylnicotinamide_d3 | 141.0975946 | 6.217 |
| 1_Creatinine_d3 | 117.0850186 | 4.908 |
| … | … | … |
| 1_Lysine d8 | 155.1630181 | 9.578 |
| 1_Phenylalanine d8 | 174.136469 | 6.92 |
| 1_Hippuric acid d5 | 185.0969033 | 3.011 |
And here is one internal standard from a library in MSP format:
NAME: 1_HippuricAcid_d5
SCANNUMBER: 1229
RETENTIONTIME: 3.011485
PRECURSORMZ: 185.0967
PRECURSORTYPE: [M+H]+
IONMODE: Positive
INTENSITY: 2.157809E+07
ISOTOPE: M + 0
INCHIKEY:
SMILES:
FORMULA:
Num Peaks: 33
51.02318    5550
56.94302    2599
57.93503    32786
...
171.3111    3202
181.08981   2837
185.09656   4996
Click the Browse Files button to browse for your MSP or CSV file, then click the Add MSP to
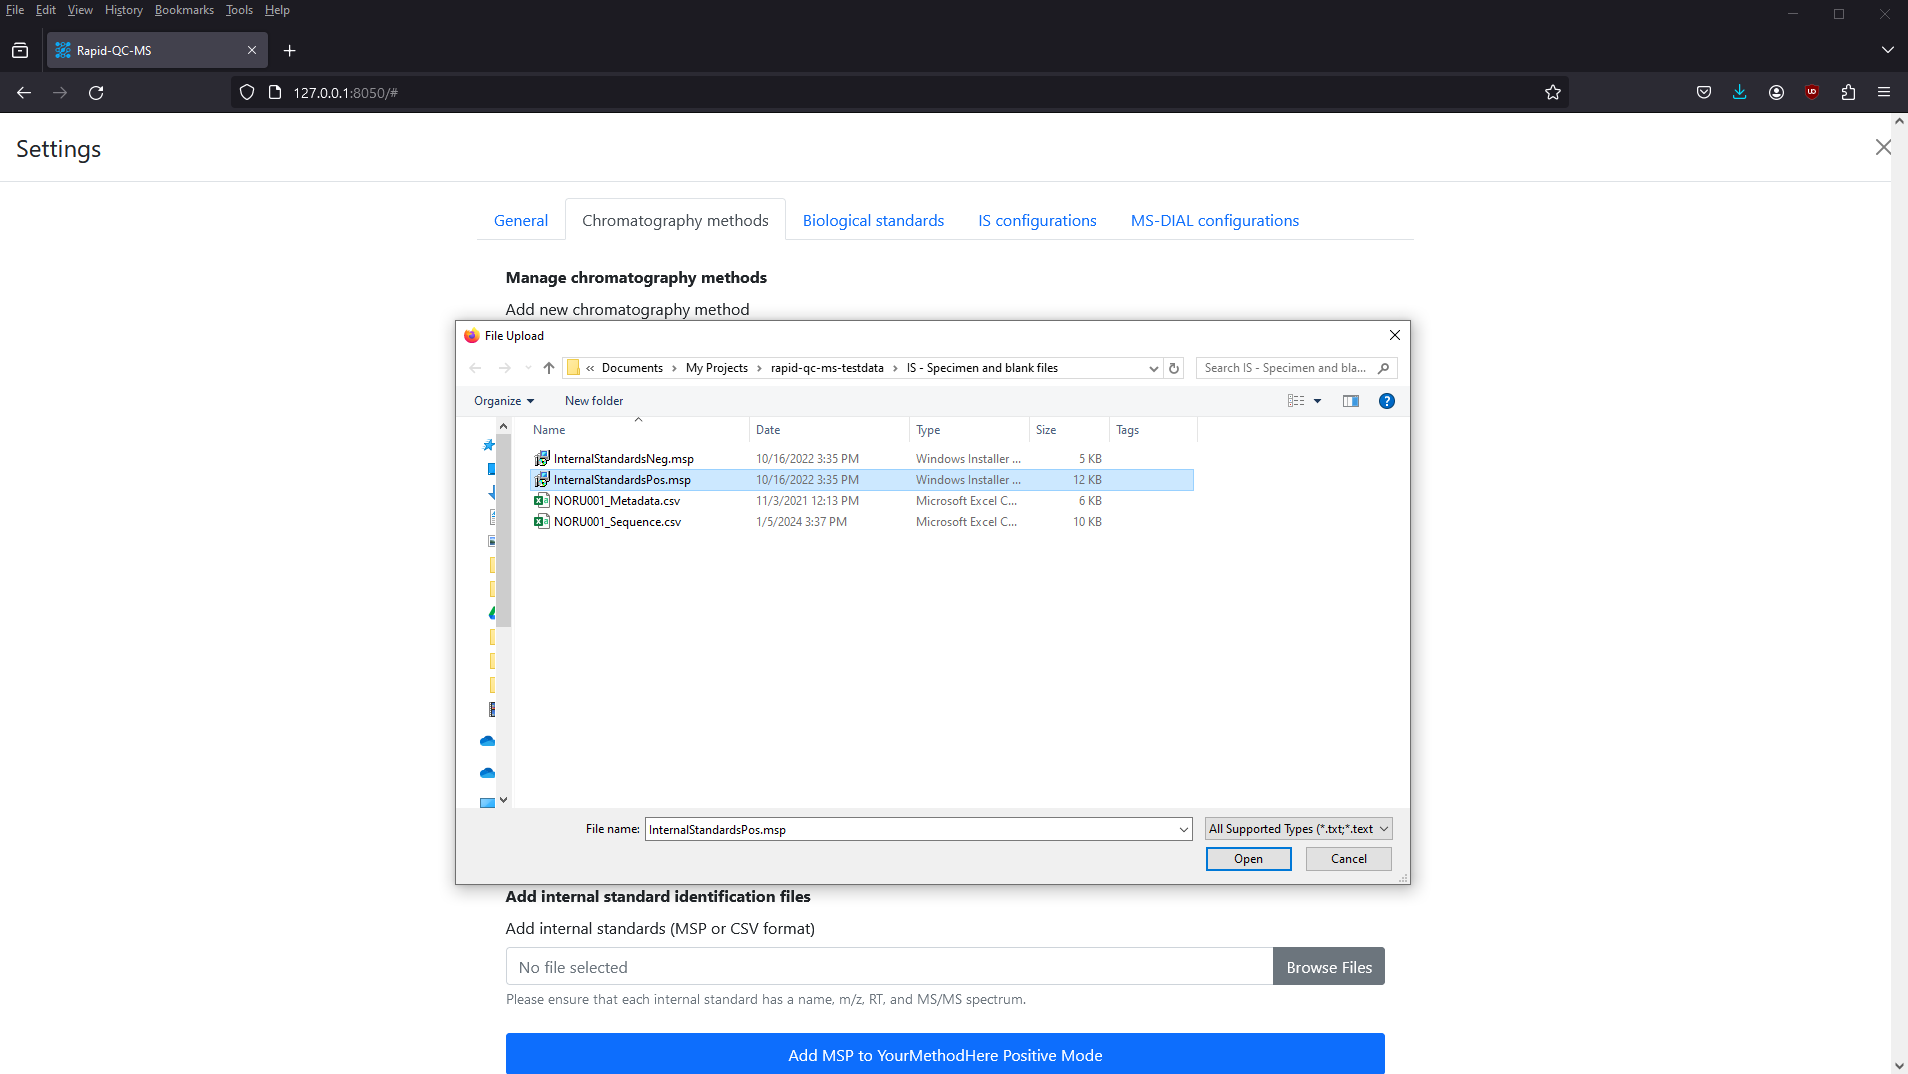
After a few seconds, your screen should look something like this:
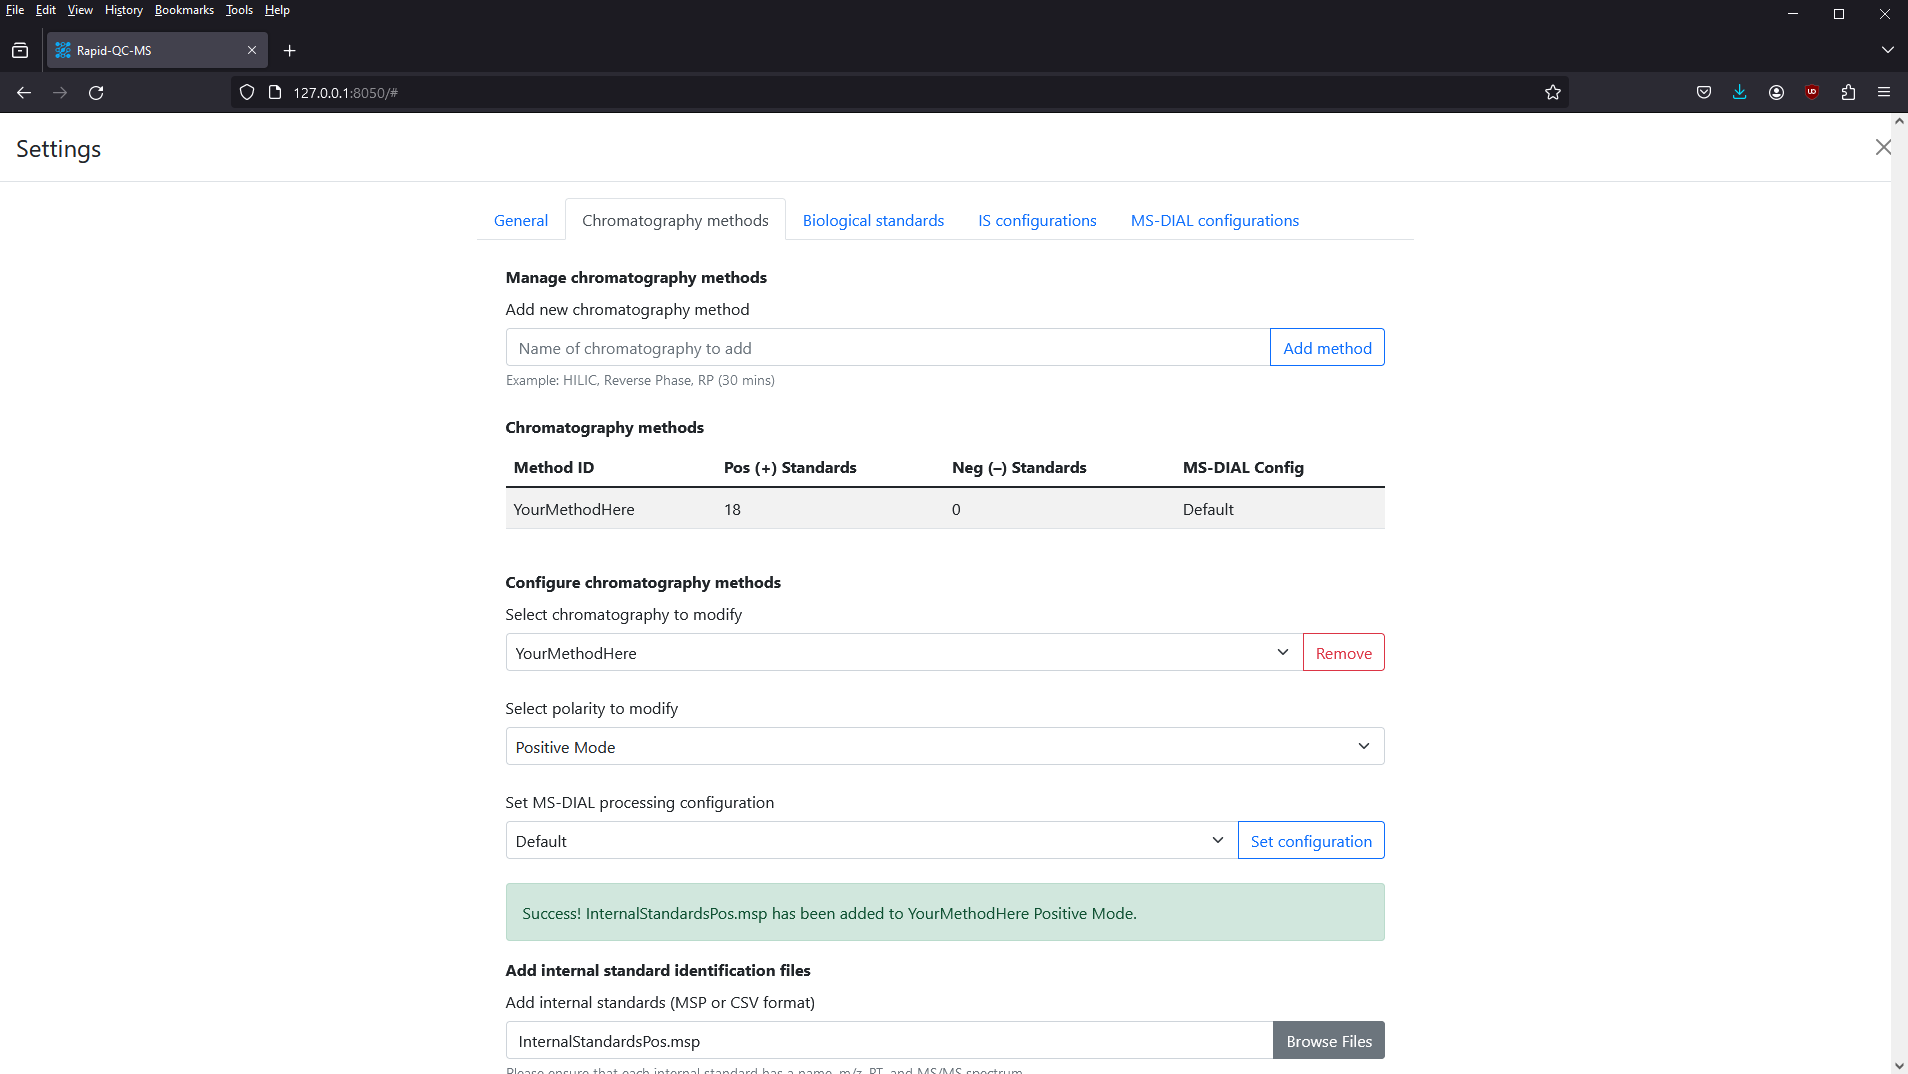
You can confirm that the library was successfully added by scrolling up to the Chromatography Methods table and seeing the updated number of Pos (+) Standards.
That’s it! Now, you can select Negative Mode from the polarity dropdown and add your negative mode internal standards.
4. Configure IS parameters
Once you have configured your chromatography methods, you can then navigate to Settings > IS Configurations to define your QC criteria. Briefly, these are:
- Intensity dropouts cutoff: the minimum number of missing internal standards in a sample to constitute a QC fail
- RT shift from library value cutoff: the minimum retention time shift from the expected library value to constitute a QC fail
- RT shift from in-run average cutoff: the minimum retention time shift from the average RT during the course of the run to constitute a QC fail
- m/z shift from library value cutoff: the minimum m/z shift from the expected library value to constitute a QC fail
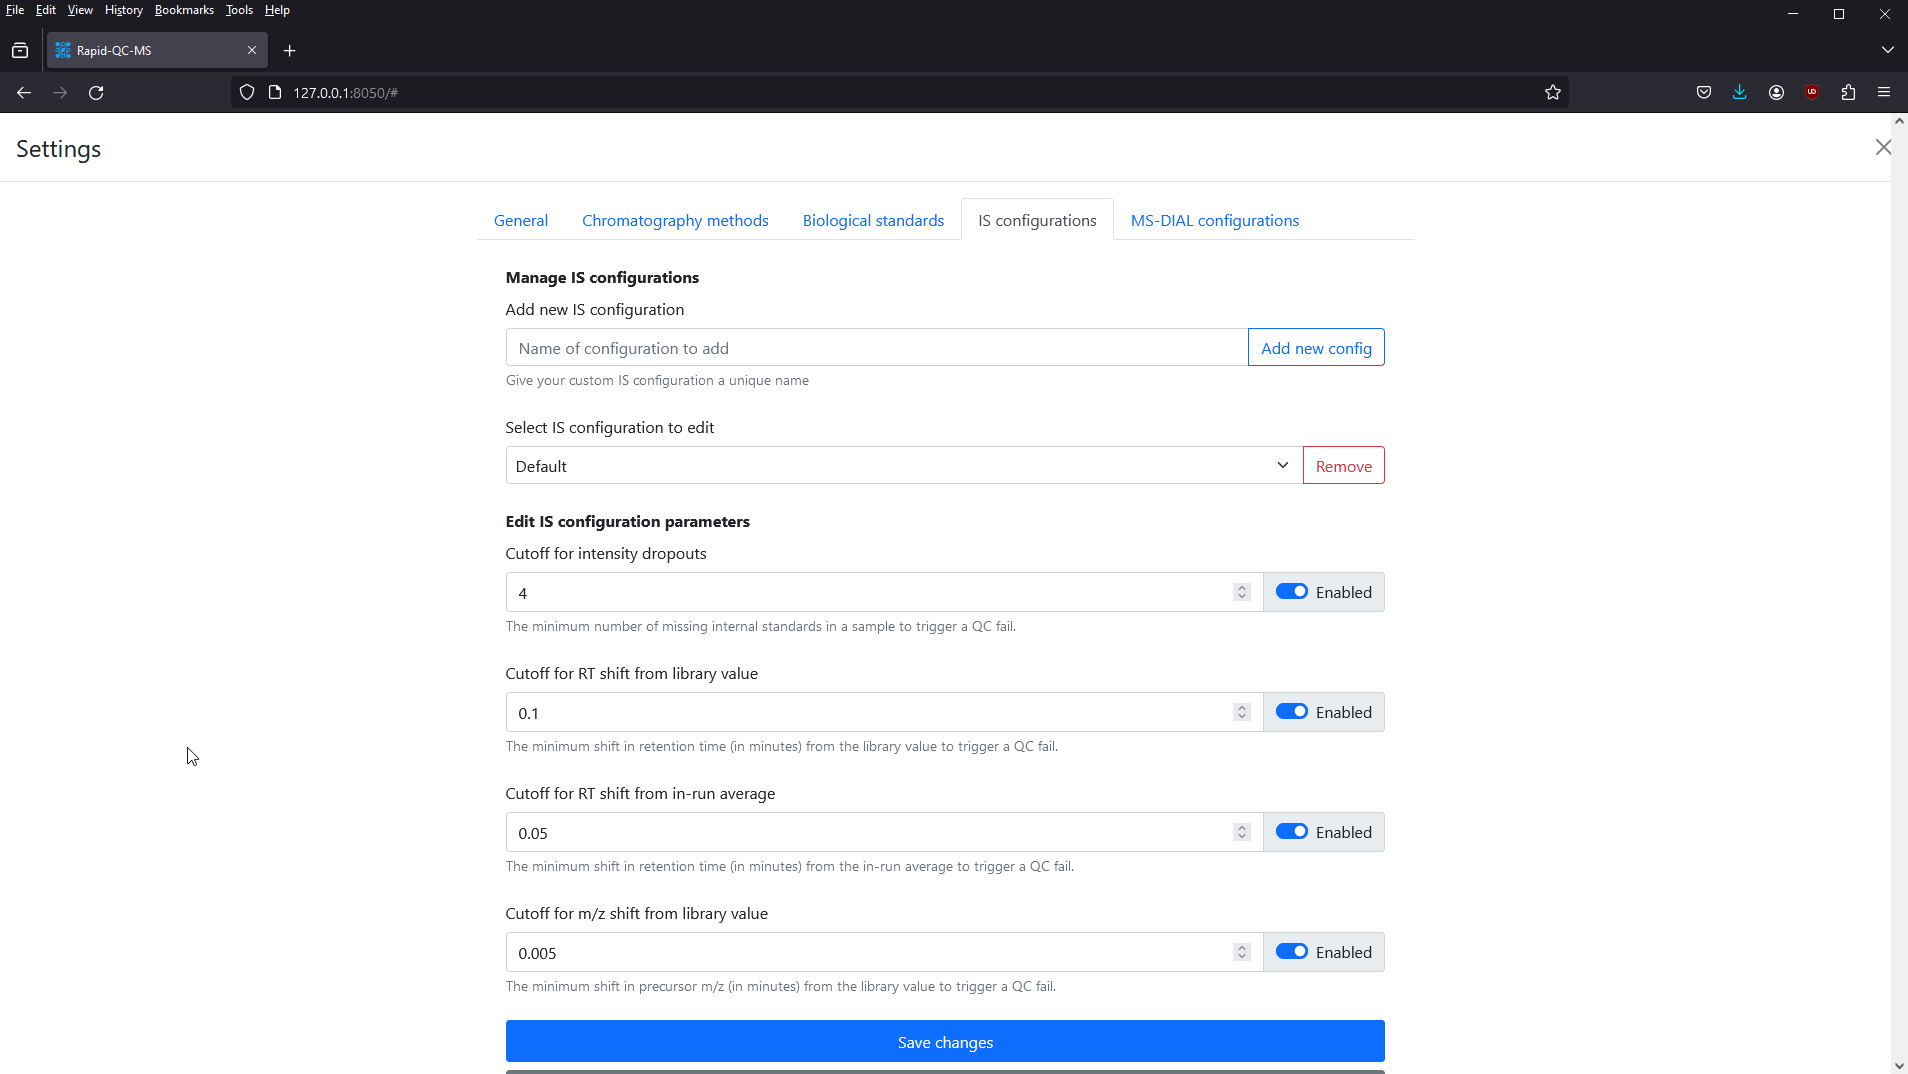
Rapid-QC-MS stores individual parameters in configurations, so that you can configure a specific configuration to fit each chromatography method.
You can specify these parameters however you’d like, and enable / disable them as needed. To revert a configuration back to the default recommended settings, simply click the Reset default settings button.
Once you’re done, don’t forget to click Save changes!
5. Specify MS-DIAL location
The last thing to do is to specify the location of your MS-DIAL download.
To do this, navigate to Settings > MS-DIAL Configurations. Then browse (or enter) the folder path containing your MS-DIAL files into the MS-DIAL download location text field.
When you’re done, click Save Changes.
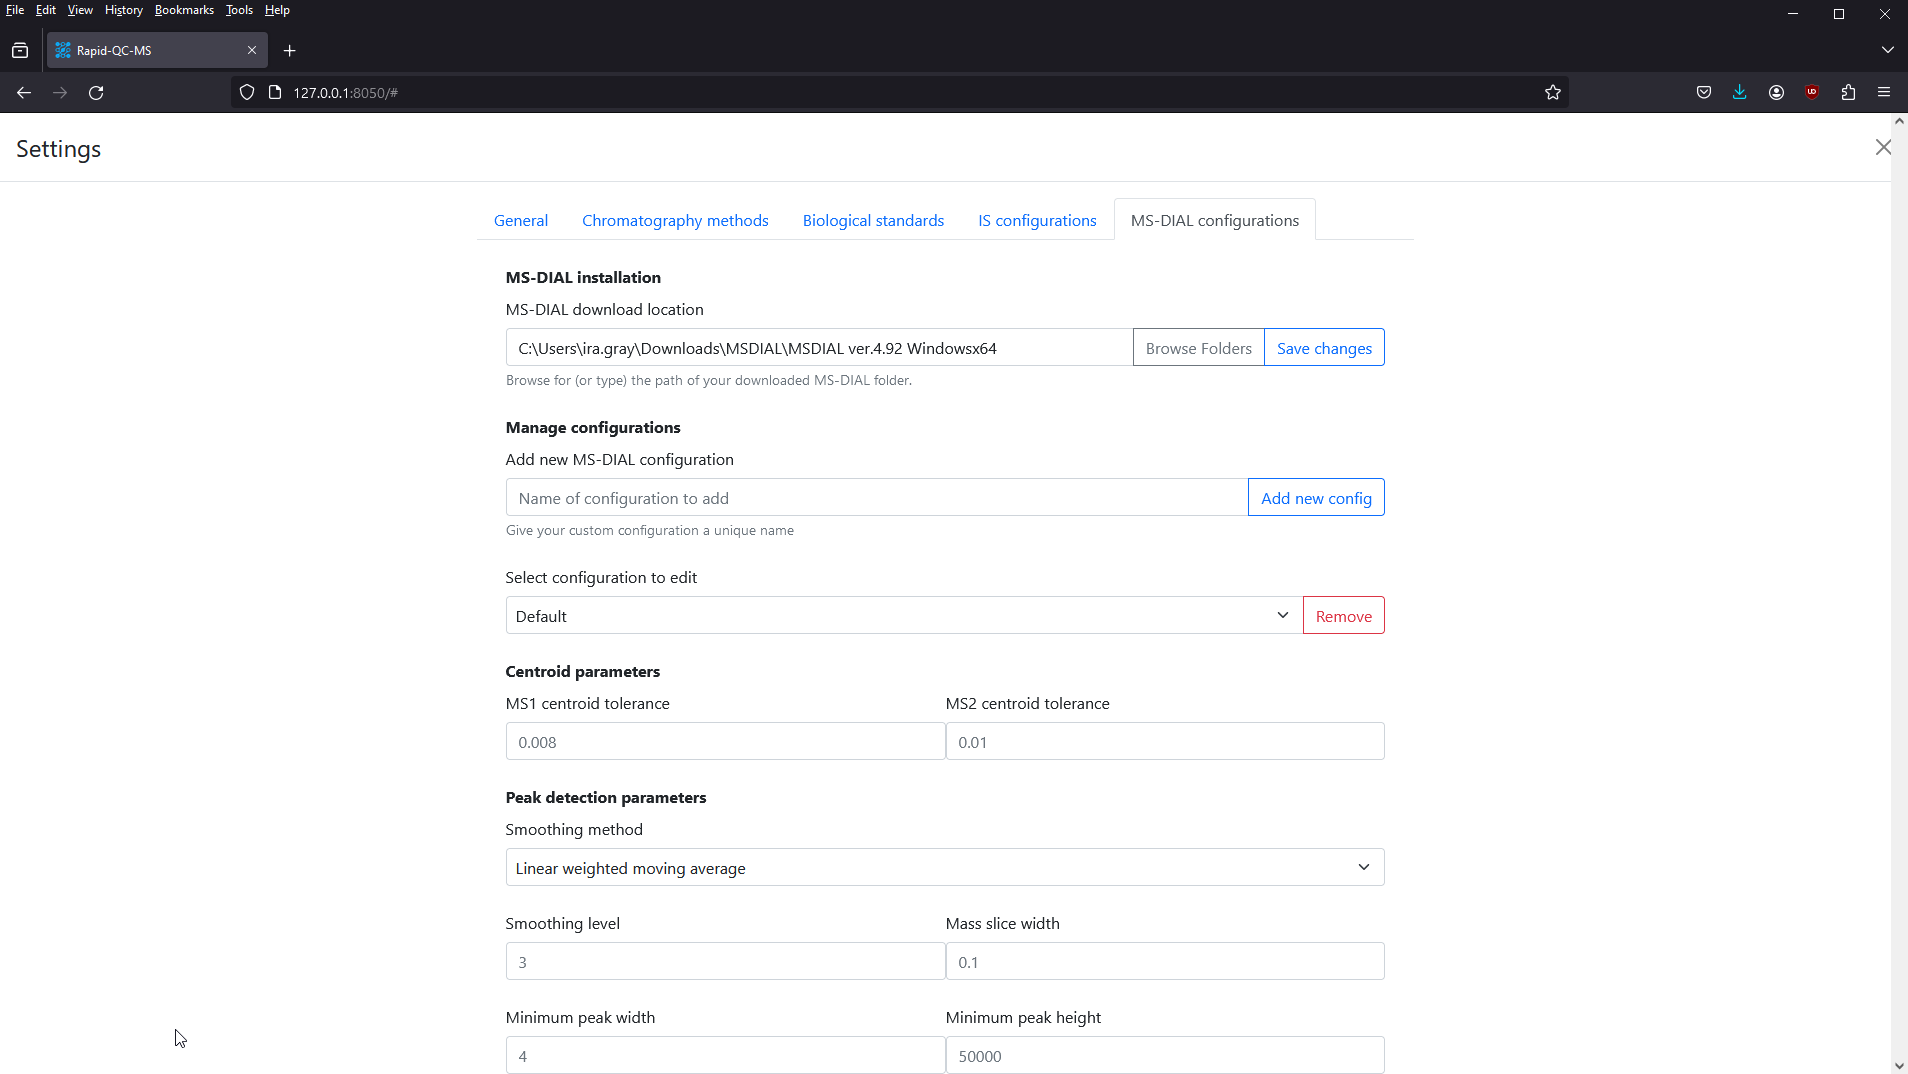
Be careful not to enter a folder containing the MS-DIAL folder! The MS-DIAL folder you provide should contain an application called MsdialConsoleApp.exe (among many other files).
6. Setup a new QC job
Setting up a new QC job was designed to be as fast and easy as possible. To get Rapid-QC-MS monitoring an active instrument run (or processing a completed batch), the user simply needs to enter a few fields of information:
- Job ID (the unique name of this analysis)
- Chromatography method
- Rapid-QC-MS configuration (select the IS configuration you desire)
- Acquisition sequence file
- Data acquisition path (easiest to copy/paste this)

Rapid-QC-MS will intelligently validate that everything is in place for it to start working. It does this by:
- Ensuring that the run ID is unique so that data is not corrupted
- Verifying that your chromatography method has valid internal standard libraries
- Ensuring that your acquisition sequence contains the required columns
- Verifying that the data acquisition path exists
- Validating biological standard libraries and sample metadata columns
Once it has validated these fields, the blue button will become enabled and you’re all set to press start.

That’s it! Rapid-QC-MS will take it from here.
Next steps
Once you feel comfortable configuring the bare necessities for Rapid-QC-MS, you can read the following sections in the user guide to customize your workspace for maximum efficiency:
- Incorporate sample metadata
- Set up biological standards
- Configure MS-DIAL processing parameters
- Enable Google Drive sync
- Add instruments to workspace (sync required)
- Grant / revoke workspace access (sync required)
- Sign in to workspace from external devices (sync required)
- Register for email notifications (sync required)
- Register for Slack notifications